The title in itself is a mouthful, I know!
Having created a static website on an S3 bucket under AWS with HTTPS/SSL, I wanted to be able to restrict access to it. This is because the page in question isn’t quite ready to launch yet. You’d think this would be quite easy, that it would be controlled on the S3 end… But, no. That would be too easy. And, using a “server service” from another hosting company, this would be easy. Suffice to say, for now, that I can’t use a different hosting provider. I have to use AWS.
In order to do this fairly simple thing, one as to use AWS WAF (Web Application Firewall) and apply an IP restriction to the CloudFront distribution you created before.
What we’ll be doing is allowing an IP address (or addresses) to access the site whilst blocking everything else.
The procedure
First of all, login to your AWS account and search for the WAF service.
You first need to define your “IP address set” – i.e. the set of IPs that you want to either Allow or Deny access to. Click on “IP sets” in the left hand menu.
Click the Create an IP set button at the top right.
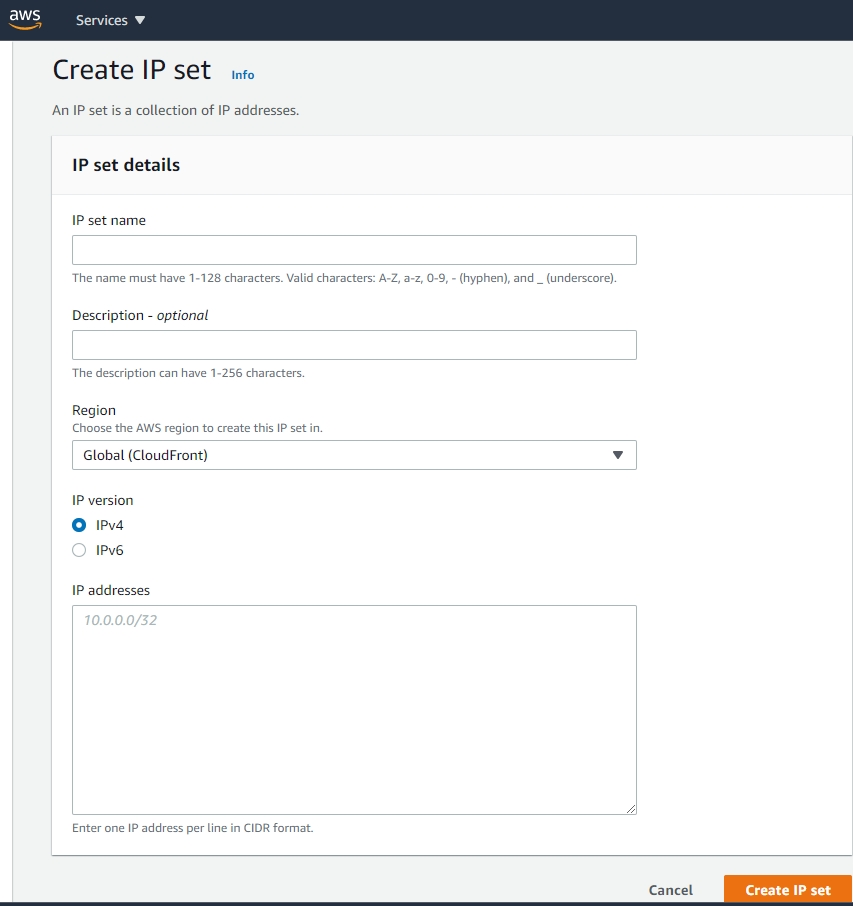
Give it a name (noting the archaic naming restrictions you need to follow) and a description if you’d like. Leave the Region as Global. Pick whether it’s an IPv4 or IPv6 set of IPs.
Enter the IPs that you want to give access to in the box, one per line. You’ll need to use CIDR format – click here if you need to generate CIDRs. If you want just the one IP address, you can enter 123.234.123.111/32 – the /32 is the ‘single IP address’ thing you need.
Click “Create IP set” and it will take you back to the IP set dashboard.
Now click “Web ACLs” in the left hand menu.
Click the Create web ACL button, top right.
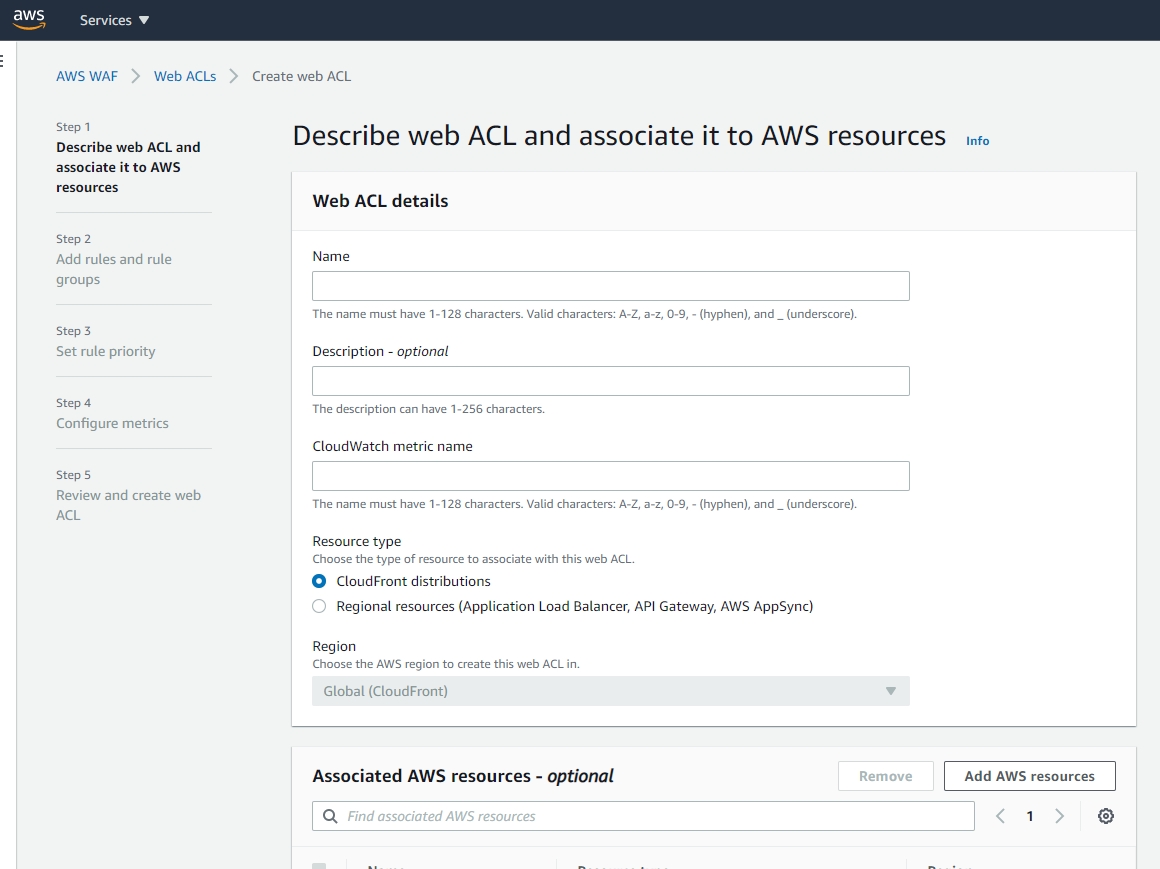
First of all, under Resource type, click “CloudFront distribution”. This will reload the page (to be honest, very stupid not to put it at the top of the page!)
Give it a name and optional description. The metric name will pre-fill. Leave Region as Global.
Under the “Associated AWS resources…” click “Add AWS resources”. In the pop-up, tick/select both of your CloudFront distributions for your domain and then click Add.
Click the Next button.
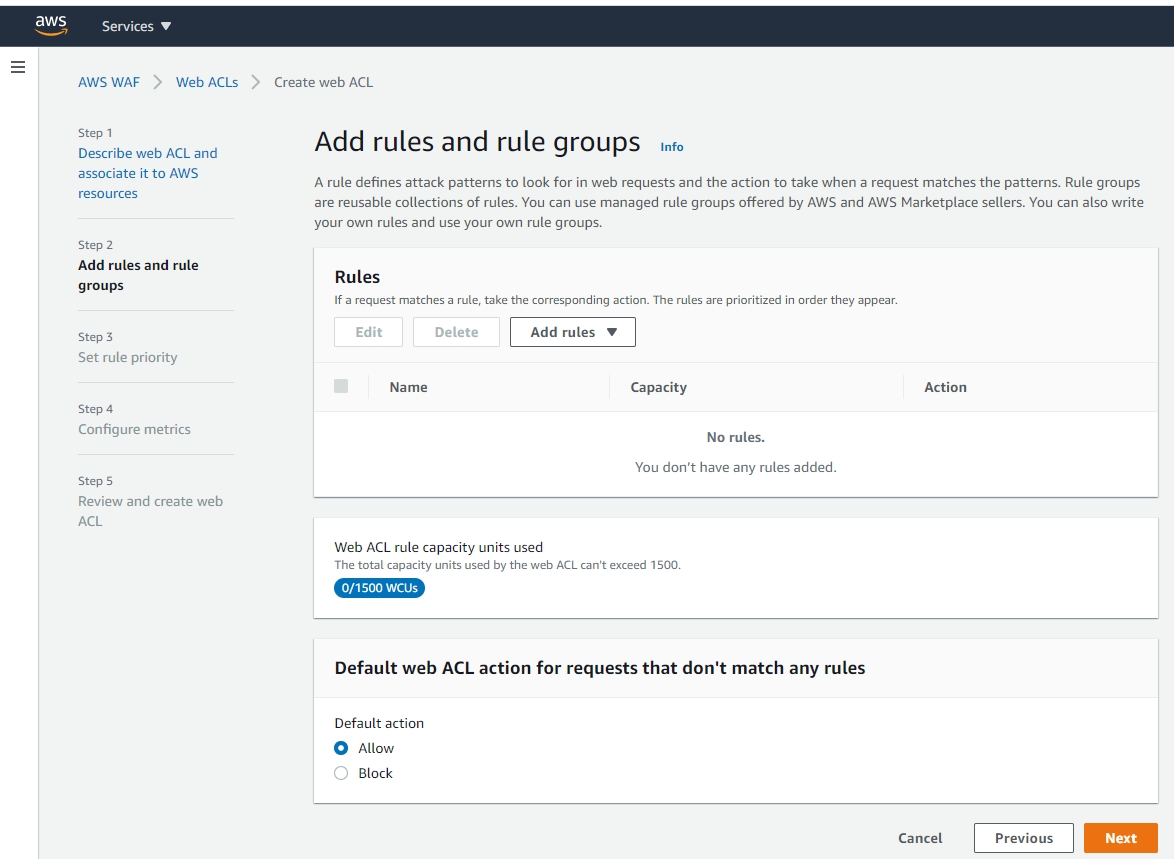
Click “Add rules” and select “Add my own rules…”. This pops up another window:
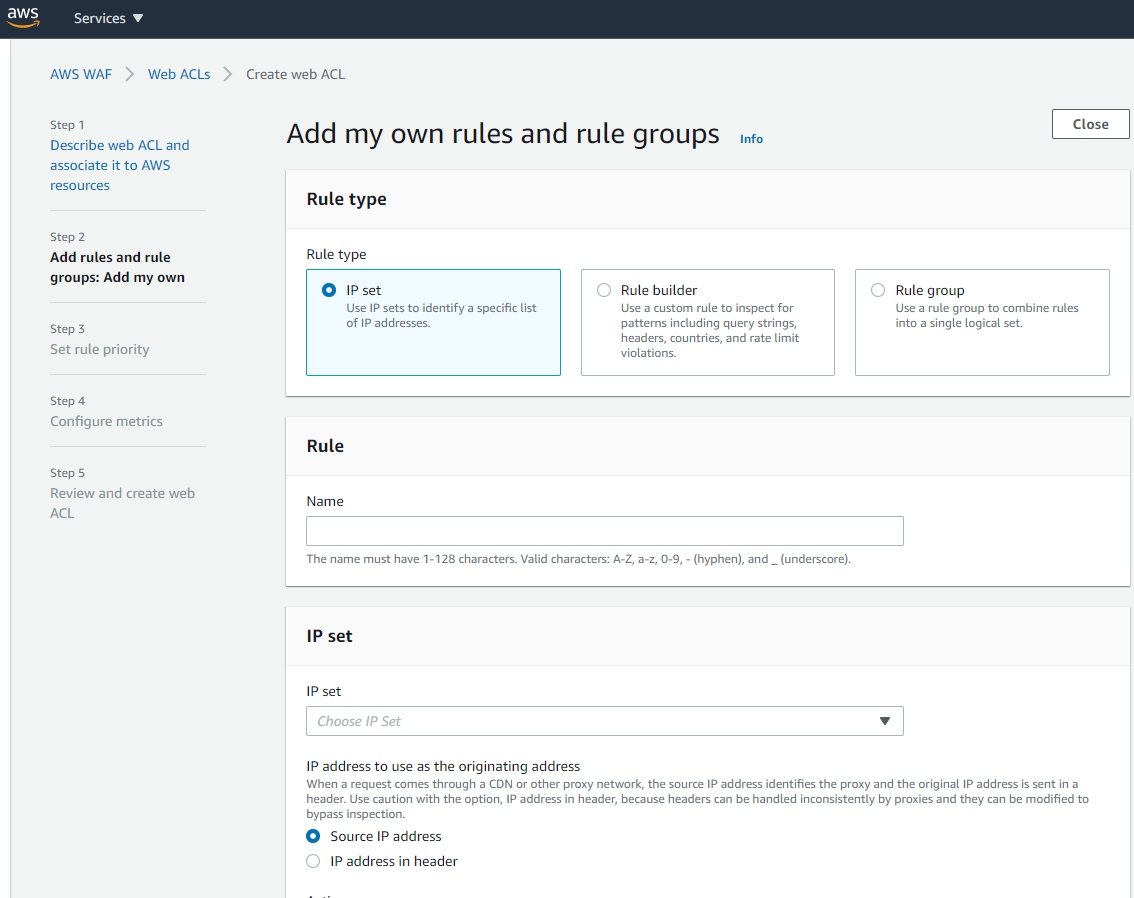
Select “IP set”, give the rule a name (something that makes sense) and then select your previously-added IP set from the “Choose IP Set” list.
Leave it or select the “Source IP address” option. From the Action list, pick Allow to allow the IPs that you selected to access you website.
Important: Under “Default web ACL action…” you need to pick Block. This blocks “everything else” apart from the IP set you’ve added that will be allowed access.
Click the “Add Rule” button bottom right.
This should return you to the Web ACLs dashboard.
You can now test out whether this works. At work, we have a VPN that I gave access to our new site, blocking everything else. I went on the VPN, I had access. I disconnected, I got a 403 error. This is correct!
Finding everything afterwards
When looking for your ACLs/IP sets later, make sure you are in the Global (CloudFront) region in the drop-down above the tables.
To open up access to all IPs
The important thing here is to make sure you don’t remove the rules you have added, but instead to just let Allow all traffic through where you have blocked it before.
- Go the AWS WAF dashboard.
- Select Web ACLs on the left hand side.
- Go into the ACL that you want to change.
- Select the Rules tab.
- Go to the “Default web ACL action…” section and click Edit.
- Select Allow and click Save.
You have now opened up access for that ACL.