About the product
The pi-top is the pre-eminent laptop solution for Raspberry Pi users. It started life as a 2014 IndieGoGo crowdfunding campaign before being made available for retail. An improved product, the Version 2, was released in October 2017.
TL;DR
Skip to the bottom of the review for our verdict.
About the review
This is a joint review of the new version by Mike Horne and Tim Richardson. We bought the pi-tops ourselves, rather than being sent them for review. We also have the pi-top v1 so we’re able to compare the two models.
First impressions – What’s in the box?
The pi-top v2 comes in a lovely, sturdy box that could be used to store it afterwards. The box contains:
- The pre-assembled pi-top chassis.
- A power brick with multiple geographic socket attachments.
- A Raspberry Pi 3 (if you ordered it to come with the pi-top – we did).
- A microSD card and SD card adapter. The microSD is pre-loaded with pi-topOS Polaris – the newest version at time of writing.
- A multi-tool that is used as a screwdriver and to retrieve the SD card from the Pi, should you need to.
- The pi-top Inventor’s Kit which includes the new pi-topPROTO+.
- A passive cooling unit known as the Cooling Bridge.
- Two manuals – a Getting Started guide and a guide to the Inventor’s Kit projects.
- Cardboard model pages – these are used with the Inventor’s Kit and comprise a cardboard robot and two other projects.

Box contents (minus the booklets)
The Chassis
The original version 1 chassis required quite a lot of assembly. Mike had two main problems with this version – the quality of the hinge mechanism (which weakened when accidentally over-tightened) and the method for attaching add-on boards to the Pi. You originally had to use some rather fiddly screws to fix everything into position. Both of these issues have been satisfactorily addressed.
The chassis now comes ready-assembled, meaning you won’t have to tighten the hinges yourself, although you have to fit the Pi yourself and affix the cooling unit on top. The add-on board method is also vastly improved from version 1’s “open up the back and use tiny screws” and inherits the magnetic rail from the pi-topCEED desktop unit. This allows you to insert pi-top add-on boards with the minimum amount of fuss.
Instead of the version 1 perspex slice, which covered the Pi and had to be removed to access the computer inside, the keyboard of the version 2 slides down a few inches, revealing the Pi. This mechanism feels solid – far more solid than we both expected it to be. It’s a terrific innovation, making the pi-top feel and look like a normal laptop when the keyboard is in place and like a proper hacker’s tool when it’s slid down. You do, however, lose the diffusing effect of the slice when it is slid into place over, say, a SenseHAT or UnicornHATs LEDs.
Speaking of the keyboard, Mike was overjoyed that it was an improvement over the version 1, which always felt a bit spongy to him. This new version is full size and feels much more solid. The accompanying touchpad, which has not only been enlarged but has been moved from the side to below the keyboard, is very sensitive, as The MagPi pointed out in their review. However, unlike The MagPi, Mike found it easy enough to get used to after a little while. Tim remarks that both features make the new pi-top much easier to use and much closer to the usual laptop feel.
The crowning glory of the new pi-top, however, is the screen which has been improved and is now 14” in size and is full HD at 1080p. It’s crisp, colourful and clearly something which was well-chosen by the pi-top team. Both the size and resolution make the pi-top a much better prospect for serious code development tasks.
Assembly
Putting the Raspberry Pi into the pi-top is fairly simple. You remove the Cooling Bridge, put the Pi in, put the Cooling Bridge back on and then slide in the Hub to connect it to the screen and external ports provided at the back of the machine. Both Tim and Mike had a little trouble pushing the Pi onto the soft USB plugs at the back as it was uncertain if it had slid into the correct position. We’re not sure what could be done to improve things as there needs to be a bit of ‘give’ to allow everything to be seated nicely. It did cause a fair amount of swearing, though, so perhaps this could be looked at for version 3.
Mike applauds pi-top for addressing the overheating issue that the Pi 3 has when under load from pi-topOS. Having used it for a while, the Cooling Bridge certainly appears to be effective.
One minor thing: the Pi Camera ribbon cable cannot be inserted while the Cooling Bridge is in place. However, it is possible to put the Bridge back on with the cable inserted, enabling you to use the Pi Camera, if you wish, with a little bit of effort. Tim wonders if it a future version of the chassis could accomodate the camera, possibly in a fixed position or tethered.
If you are expecting the pi-top to have the fit and finish of a standard mass-produced laptop from the likes of Dell or HP, then I’m afraid you will be disappointed. There are some uneven gaps around the edges of the chassis and with the sliding keyboard. Tim thinks that this is due to the choice of plastic; the plastic chosen is far more resilient to knocks and scrapes compared with your normal laptop, which is important for the type of environment the pi-top is aimed at. This is not an issue and certainly won’t affect use, but just be aware.

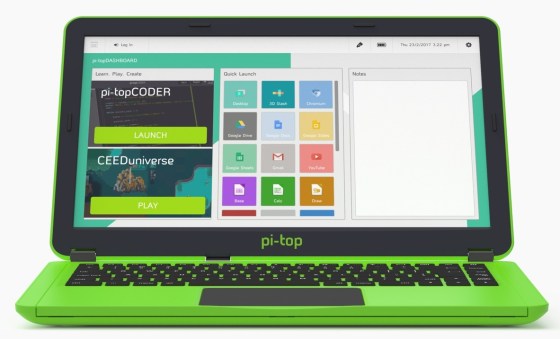
An assembled pi-top v2
Inventor’s Kit

The pi-top Inventor’s Kit
Included in the box is the pi-top Inventor’s Kit. This represents a lot of ‘added value’ that elevates the pi-top from “just” being a Raspberry Pi laptop to being something that has a lot of use and provides a lot of learning from day one. The Kit includes the following components:
- pi-topPROTO+ add-on board (of which more later).
- Several plastic bags of resistors, labelled with their value.
- Two potentiometers.
- A micro-sized microphone / sound sensor.
- An oversized light-dependent resistor.
- Two large tactile buttons.
- Six 10mm LEDs.
- A buzzer.
- Several capacitors.
- An SR-04 ultrasonic distance sensor.
There are a lot of electronics starter kits out there, including the CamJam EduKit. The components included in these other kits vary greatly and so Mike hesitated a bit before opening the box the Inventor’s Kit comes in, afraid of disappointment. However, he was pleasantly surprised at the contents. There is a lot of stuff here, very generous, and it’s clear that pi-top has put a lot of thought into what projects can be done with the components and how they can be used together to be more than the sum of the parts. The best part of the Kit, however, is the pi-topPROTO+.
The pi-topPROTO+

The pi-topPROTO+
The pi-topPROTO+ breaks out the Raspberry Pi’s GPIO pins to a 40-pin female header with additional female ground and power headers. In the centre is a breadboard to connect up your circuits. The PROTO+ also adds an analog-to-digital converter, giving six very useful analog pins for your use. Adding analog input is a master stroke; when using sensors, you end up crying out for analog inputs on the Pi, and the PROTO+ delivers this very nicely.
The only problem Mike had with the PROTO+ is that, as the main header is female, it is not possible to plug in a HAT or other add-on board. This is a bit of a design flaw, but the original pi-topPROTO board (without the +) has a male header into which you can plug HATs etc. This does take up room in the pi-top chassis, though, and it may come down to a choice between the PROTO and, say, the pi-topPULSE HAT, although of course you can just plug the PULSE into the PROTO, so it’s not all bad news.
The software (pi-topOS)
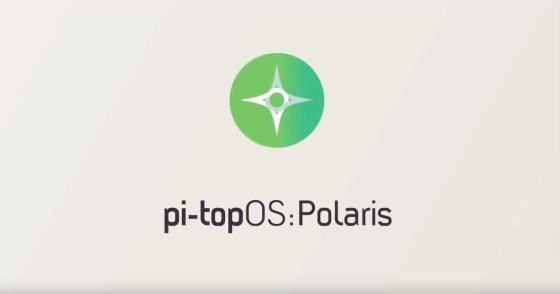
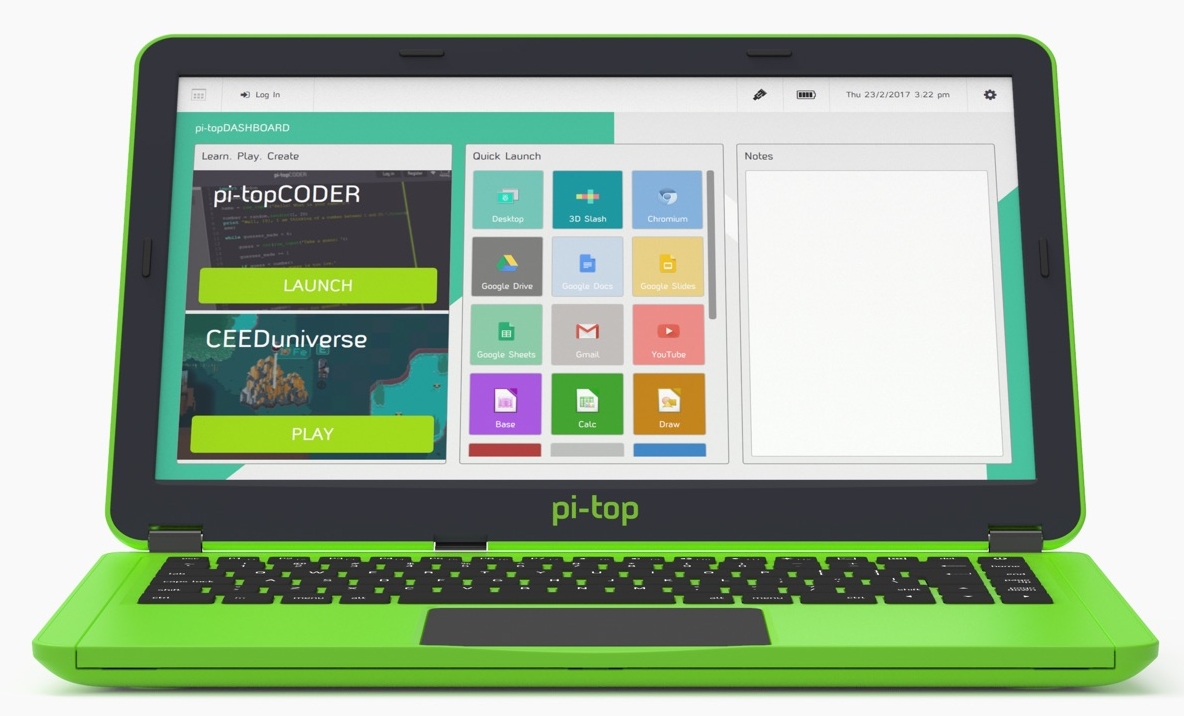
pi-topOS has been out for a while now and the pi-top v2 comes with the latest version already written to an included microSD card. The current version, Polaris, features pi-topCODER (a learning interface and coding input program) and CEEDuniverse, a gamified coding learning system.
On first use, Tim noticed that the OS appeared much quicker. We have noticed that, under prolonged use, our pi-top v1 and pi-topCEED Pis get pretty hot, displaying the Raspbian heat warning icon. The new version of Polaris, the pi-top version of Raspbian, has fixed the problem (the dashboard used to run in the background consuming a lot of resources).
We won’t go too much into CEEDuniverse, apart from to say that we enjoyed playing it and can see that it’s a good go-to when learning from typed code becomes too much of a chore and you want a break, or when you need something fun to introduce programming concepts such as loops and functions.
We want to talk about pi-topCODER, however, as there are a large number of resources available within it and the printed material that comes with the pi-top v2 uses it extensively. You are provided with a booklet that guides you through a series of physical computing challenges. You then search for the challenges within CODER and progress through them. The challenges use Python and are a mix of GPIOzero and also ptinventor, a library of code provided on pi-topOS. The booklet is a beautifully printed, high quality affair and it takes you through a series of topics without ramming those topics down your throat. In fact, you can start from anywhere in the booklet and the tutorials provided through CODER will be achievable.
Although he had an overall positive experience with CODER and the tutorials provided, Mike did find some problems with the text of those tutorials. There are a few typos spread throughout the 20 or so he tried out. There is also a slight lack of help occasionally – resistor values in particular are spotty: sometimes given, sometimes not. With feedback, we are sure those will be addressed rapidly and we’re happy to say that giving that feedback is very easy through an in-system button.
However, the tutorials are great fun and you learn a lot through them. The physicality of the projects is very welcome and you’ll soon be lighting up LEDs, accepting button presses, reading sensor values and playing sounds through Sonic Pi in no time. There is a repeating element of sound throughout, in fact, and the psonic library (which translates Python commands to Sonic Pi) is very handy, although the surface is only just about scratched. Mike liked the way that each project within a theme built upon previous ones although a bit of separation between the themes in the booklet would be good so that you can find the one that you are most interested in.

The Inventor’s Kit robot – assembled and populated with sensors and LEDs!
Overall
The pi-top v2 is a vast improvement over the original. They’ve thought about, and improved, the chassis a great deal as well as the screen, keyboard and trackpad. The battery life is understood to be slightly lower than the extraordinarily long life of the original. This is, perhaps, due to the improved screen, or maybe the battery is smaller. However, in use, Tim doesn’t think you would notice much difference as a charge still lasts well past any other laptop’s battery!
The included resources are well thought-out and well-written, although a little more care with the tutorials would be welcome. The software puts a much nicer sheen on Raspbian, which remains in the background and is called upon when necessary, such as when you want to open a web browser. pi-topCODER and CEEDuniverse are both excellent additions to the normal Raspbian offering providing high-quality, deep learning in a progressive manner.
We don’t hesitate to recommend the new pi-top. It is on the expensive side, as it always was, at $320 or £292 (including the Pi) but if you want a nice, compact unit with plenty of added value from the Inventor’s Kit and resources, and a lovely screen to code on, it’s absolutely ideal.
You can buy the pi-top from pi-top itself on their website. You can also buy it from The Pi Hut and ModMyPi.

Playing with the Inventor’s Kit