Alex Eames has written a great blog post in which he wires up and uses a 7-segment display using the Raspberry Pi. The display, which is of the common cathode type, has 4 digits and Alex shows you how to get resistors in place to prevent the display from burning out. He then provides the Python code to display things on the unit. He is offering kits for £12, including postage, which I think is good value for money considering what is contained in it (pictured below). Read the blog post here.
Tim Richardson, Jamie Mann (of The Pi Hut) and myself are very proud to announce the official launch of CamJam EduKit number 3. This one is all about Robotics and provides (almost) everything you need to build your own Raspberry Pi-powered motorised buggy. The best news is that everything comes pre-soldered so there is no excuse not to get started! 🙂
The kit, which you can buy from The Pi Hut for £17 + postage, includes the following:
A custom-designed, pre-soldered motor controller board (with screw terminals) designed by Gareth from 4tronix
Two DC motors (with wires pre-soldered)
Two custom red wheels (which go extra fast… because they’re red!)
A ball castor (used as the ‘third wheel’ to your robot)
A small breadboard (to create your circuits)
Two pieces of strong 3M padded double-sided tape
A battery box for 4 AA batteries (batteries not included)
An ultrasonic distance sensor (for detecting objects in front of your robot)
A line follower sensor (for detecting and following black lines)
Resistors and jumper cables with which to complete your circuits
A strong cardboard box to keep it all in… or to cut into to make your chassis!
All you need to provide is: a chassis (use your imagination or use the box the kit comes in!), 4 AA batteries and a screwdriver.
We hope that everyone who buys the EduKit will have great fun with it. We’ve worked really hard to make the kit as fully-featured as possible, giving you the option of both manual remote-control and two ways of autonomous operation. There’s plenty of stuff to learn and play around with and, we think, it represents great value for money at £17. So, if you’d like to buy the EduKit, head over to The Pi Hut!
We’d like to extend our thanks to the beta testers and reviewers who have looked over the kit and provided feedback, photos and videos!
Main photo at the top of the page by Alex Eames, RasPi.TV
Martin O’Hanlon has previously used Pi Aware to access publicly available data about aircraft positions. Now he has taken his work further by creating a RADAR system that displays aircraft positions relative to your GPS co-ordinates. It’s a great example of taking a simple API and creating something great from the data. All the code is available on his website, so head over there to find out more.
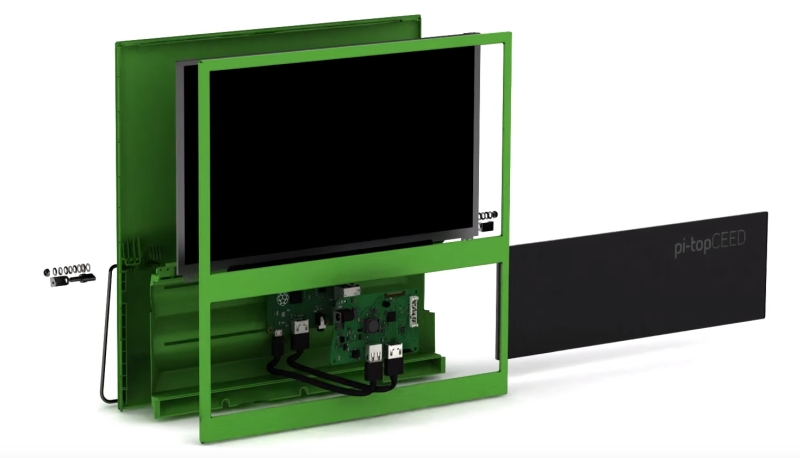
The Pi-TopCEED offers you a Pi-based workstation with a 13.3″ HD LCD screen surrounded by a case that has an integrated stand. You then simply plug in a keyboard and mouse and away you go. The campaign offers the whole workstation, including a Raspberry Pi 2, for $99 plus shipping (which is around $19). Also available is a Pi-less option for $70. That’s $70 for a 13.3″ HD screen, case and stand. Both of these pledge levels are outstanding, in my opinion, and make a pretty portable HD screen really affordable.
Also included in the pledge level that includes the Pi is an SD card pre-loaded with pi-topOS which seems, from screenshots and videos, to be a very robust, user-friendly OS. Included in the OS is access to CEEDuniverse, which is an online multiplayer game that seeks to enhance learning through play. You also gain access to the Pi Top community which is beginning to establish itself following the successful shipping of the laptop products.
Estimated delivery for the CEED is April next year which I would say is very ambitious – be aware most crowdfunding campaigns deliver late. At least they’re not promising delivery before Christmas! 😉
I’ve already chosen to back the campaign and I hope you’ll give it strong consideration. It’s got the verbal backing of Eben Upton, CEO of Raspberry Pi Trading, so clearly the product prototypes have been impressive.
I wish the team, led by Jesse and Ryan, all the very best for the campaign.