A few people noticed that a recent episode of the TV show ‘Revolution’ (the one where all electronic equipment dies) featured a slightly modified Raspberry Pi. Here’s a screengrab courtesy of Engadget.
And another courtesy of Adafruit:

After trying the instructions here to use netcat and mplayer to stream from the Raspberry Pi camera module to Windows, I found that although the cache filled on the Windows machine, indicating that data was being received, mplayer never launched. I searched around a bit and came to the conclusion that it was something to do with either Windows 7, or having a 64-bit machine. I settled for the 64-bit issue as it’s not uncommon for the 64-bit architecture to create problems.
I eventually found a combination of netcat and mplayer that worked! Here’s a tutorial on how to do it.
Download netcat 1.12 from here.
Download the AMD64 version of mplayer r36169 from here.
Unzip them on a Windows machine into a folder so you have, amongst other files::
    MPlayer-x86_64-r36169+g2844ea8mplayer.exe
    netcat-win32-1.12nc64.exe
Created a batch file (called Wait-for-stream.bat) with the following command in it:
netcat-win32-1.12/nc64.exe -L -p 5001 | "MPlayer-x86_64-r36169+g2844ea8mplayer.exe" -vo direct3d -fps 31 -cache 1024 -
Note: I had to specify the -vo direct3d option as otherwise all I got was a black screen. No idea why this was needed, but I guess it’s something to do with my laptop specifically, so you may find you don’t need it.
On the Raspberry Pi, create a script (stream-to-netcat.sh) and add the following line to it:
raspivid -t 999999 --hflip -o - | nc 192.168.1.64 5001
An explanation:
On the Windows, run the batch script Wait-for-stream.bat to start the ‘listener’. You should get:
MPlayer sherpya-r36169+g2844ea8-4.6 (C) 2000-2013 MPlayer Team
Playing -.
Reading from stdin...
Cache fill: 0.00% (0 bytes)
On the Pi, run the stream-to-netcat.sh script. Nothing should appear on the Pi.
On the Windows machine, the Cache will start to fill up, a bit of Codec debug will appear and the video should show on-screen.
And that’s it! A lot of fiddling about, but worth it so I can run Windows on Saturday at the Cambridge Jam! (And just to prove I could!)
 Alex Eames has done an excellent tutorial on capturing video with the Raspberry Pi camera module and converting it into an MP4 file suitable for video editing with Pinnacle or other video editing software. Head on over to RasPi.TV to watch the video and read more.

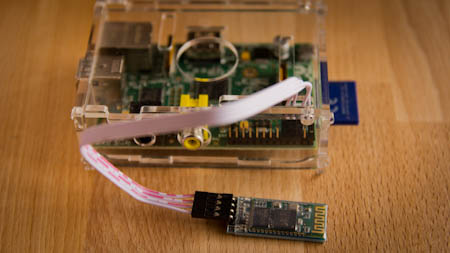
Miguel Grinberg has been experimenting with a bluetooth UART serial module. I covered this previously with a different author’s post, but I never got it working. There is a slight change in methodology (and speed of the serial port) here, so I thought it was worth a new blog post. Read about Miguel’s efforts here.
If your video recording from the camera module has any kind of flashing on it, try the following:
raspivid -fps 25 – o video.h264
This will set the frames-per-second to 25. The flashing is caused by the frequency of artificial lighting in the UK (and possibly Europe).
Matthew Manning at Raspberry Pi IV Beginners has done an excellent set-up video for the camera module which takes you through the insertion of the cable through to taking video and pictures with it.